Walnut Pencil Case
Introduction
For a while I’ve been using physical not taking in order to keep track of tasks, log thoughts and just generally brainstorm ideas. This is mainly due to the fact that I became very used to taking physical notes during my undergraduate degree and just didn’t stop and the fact that whenever I have tried to use digital note taking it has just enough friction that I don’t stick to it. I also like physical objects so dealing with notebooks and various items of stationary seems to be inherently enjoyable for me.
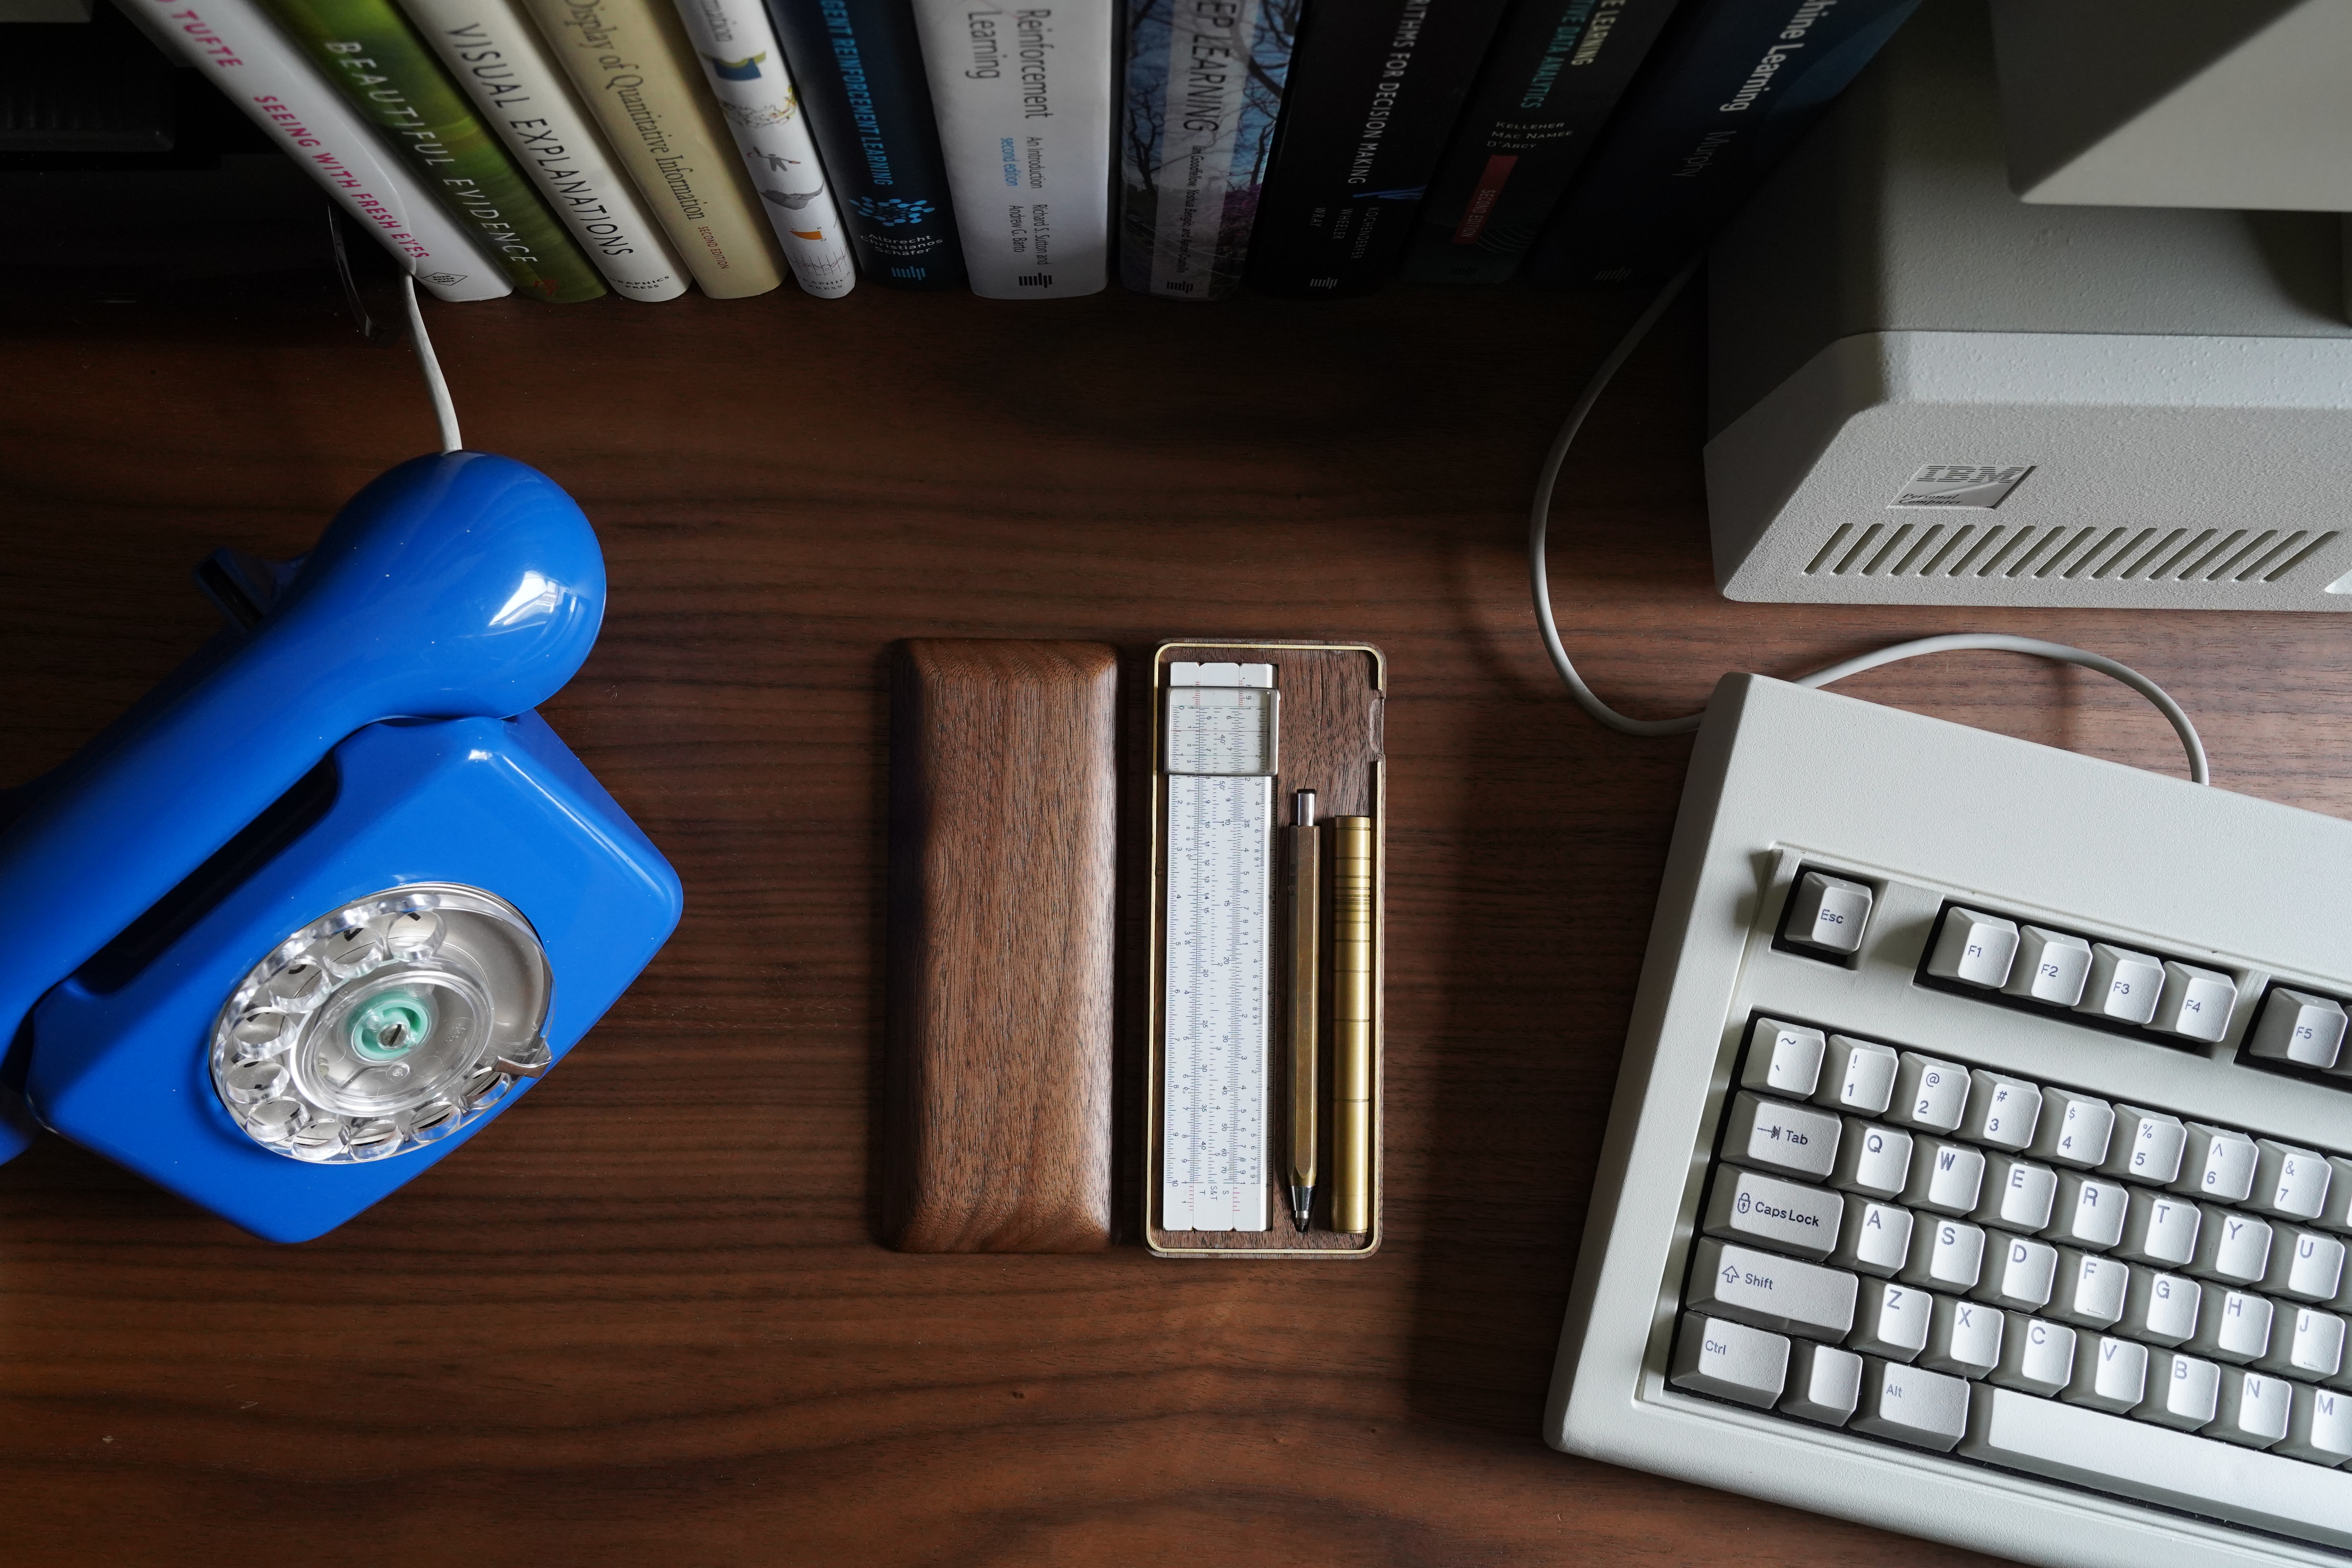
As part of this I have collected a minimal set of items that I like to carry with me alongside a notebook in order to effectively take notes. These mainly consists of a brass pen and pencil from Rick Powell Design, and a slide rule. The pen did come this a walnut tube to store it in, however I wanted something that could hold all the items I carry daily.
Design
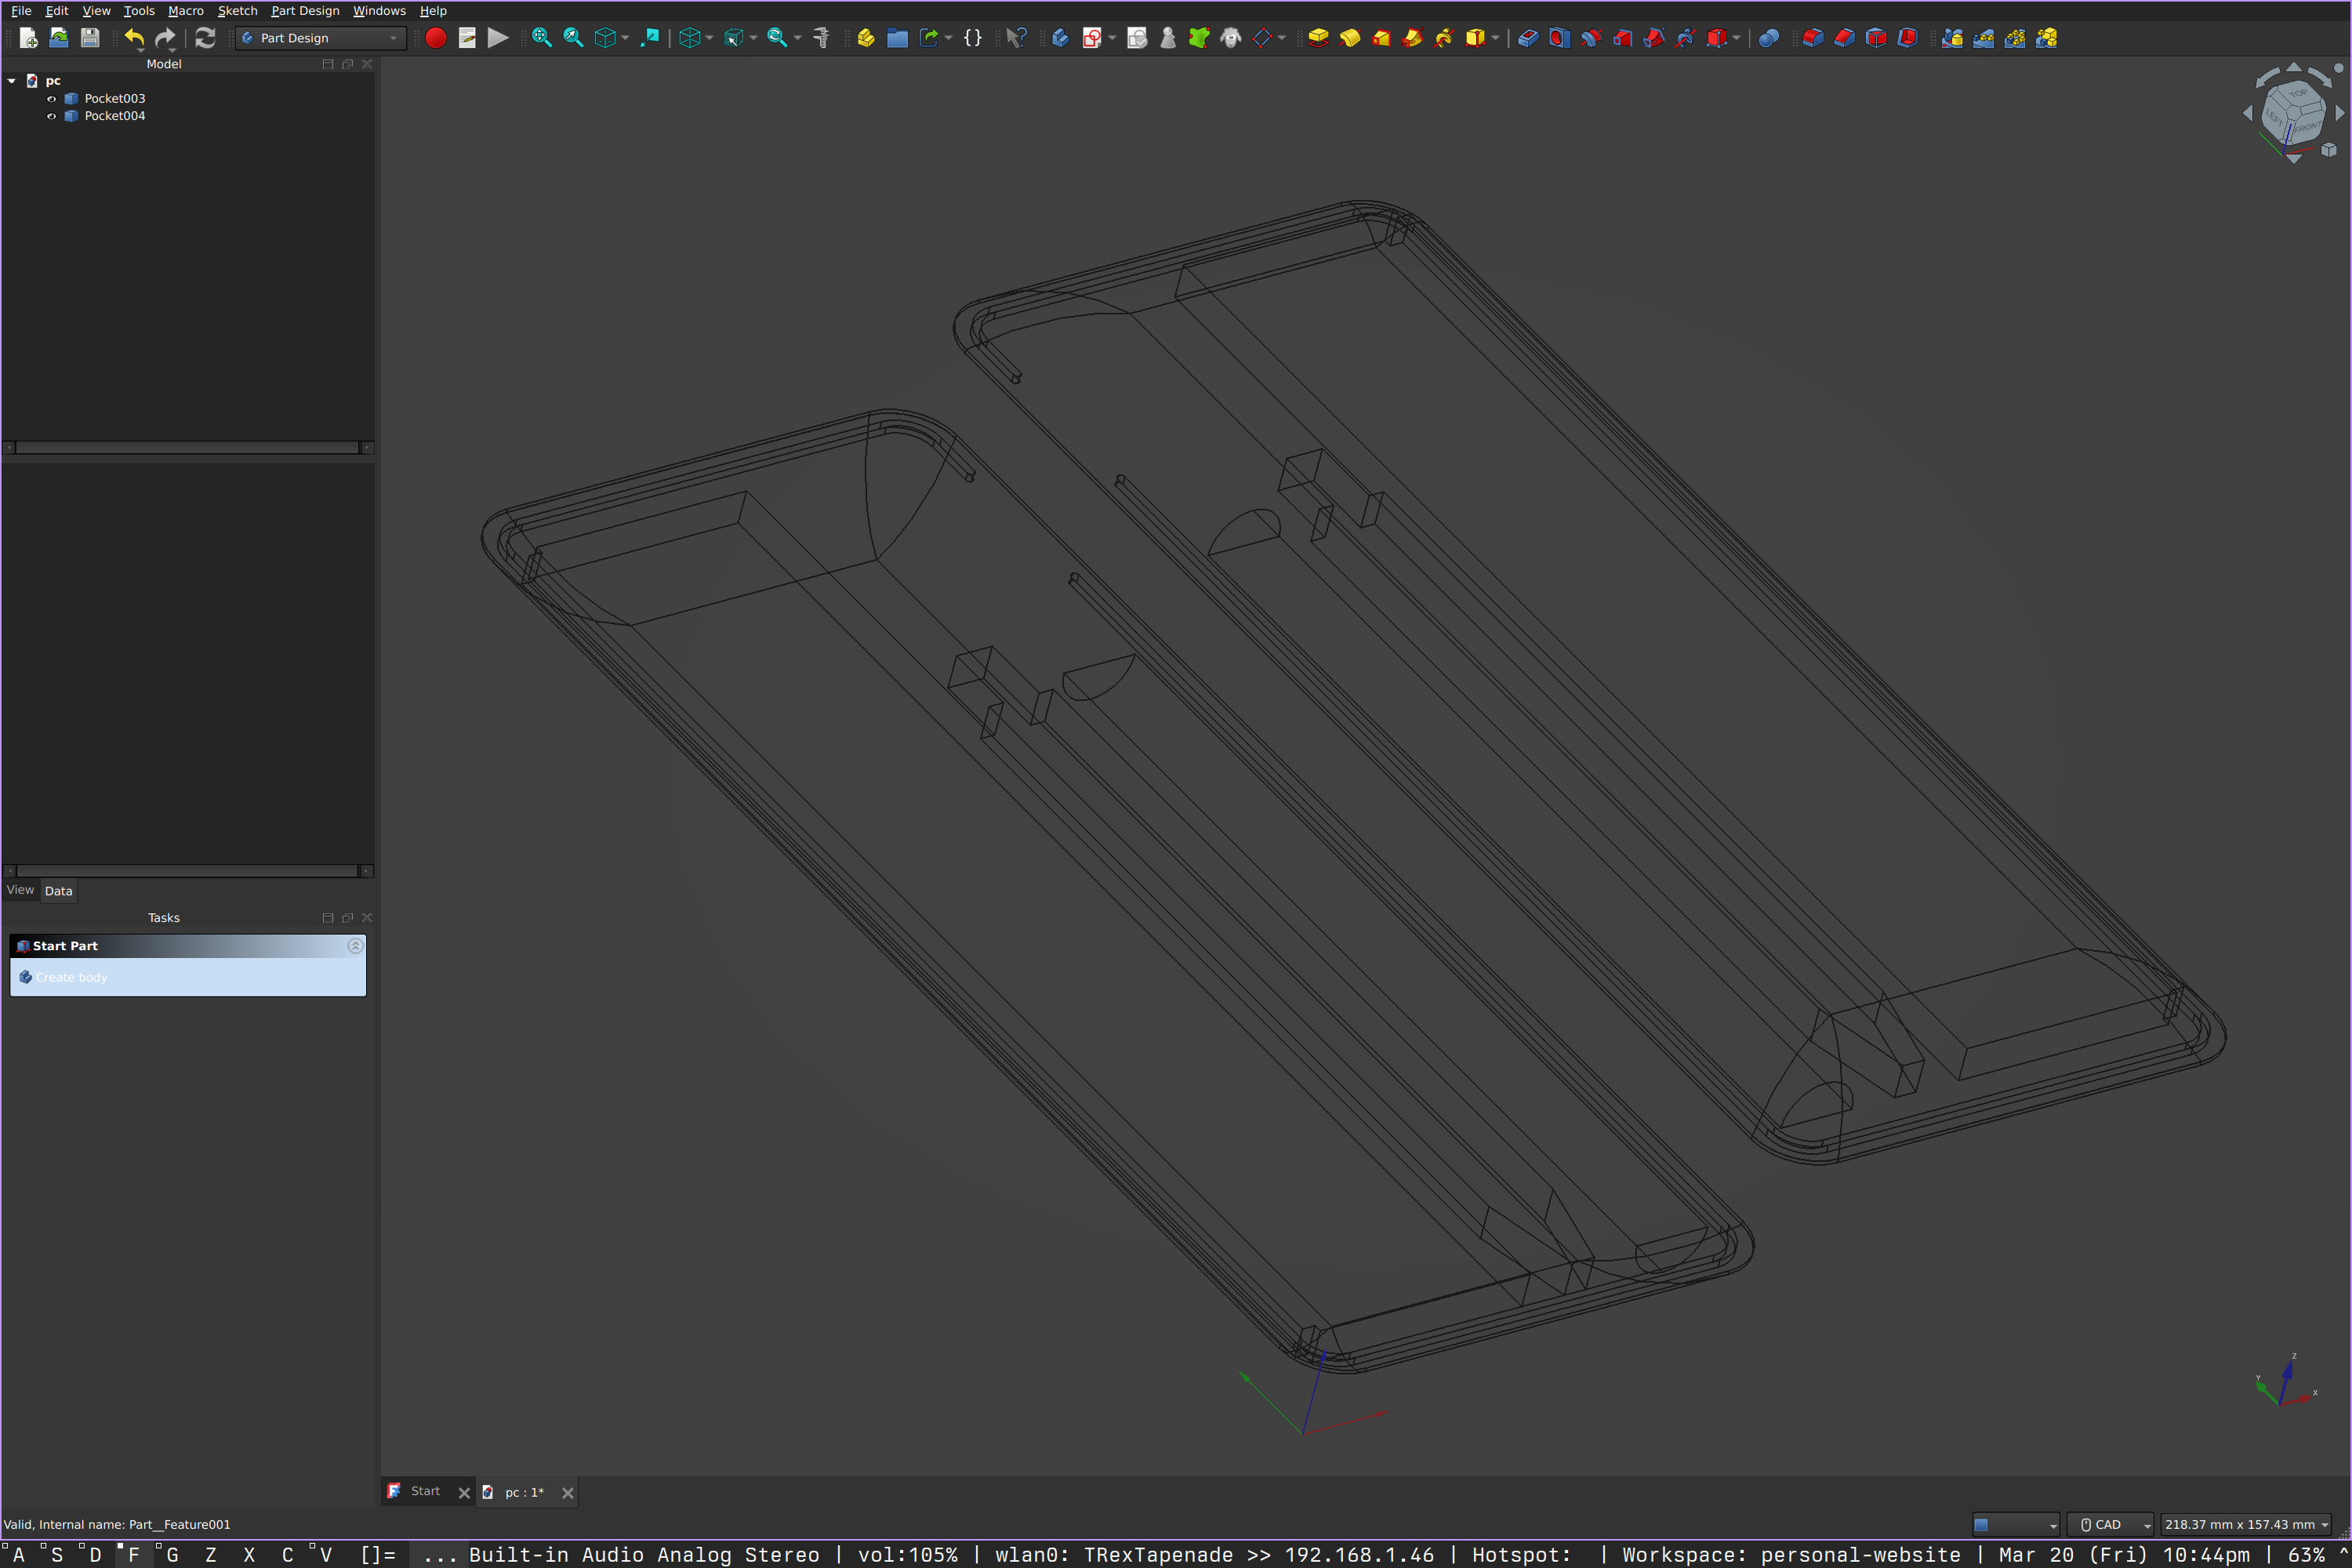
For the design of the pencil case I wanted it to be as small as possible but provide enough protection that it could just be thrown in a bag. I ended up using FreeCAD in order to create the design, combining chamfer and fillets in order to get the shape correct. As the case would necessarily need to be rather thick I designed a shape that would taper quite aggressively towards the edges in order to give a perception of it being thinner than it is. This is a similar approach used on the original Macbook Air. There are custom pockets for each of the items I want it to hold with small tolerances. In order to allow for closing the case I went for a tongue in groove design where the upper half friction fits on a brass track.
It ended up being a pretty simple design to replicate in FreeCAD meaning most of the time for this project was spent on CNC milling and finishing.
CNC Milling
For the CNC milling there are only four main parts, top and bottom halves of the case, brass track for closing and the brass plate for the back of the case for accent and to allow engraving. However each half of the case does require two operations, one for the internal geometry and then the piece needs to be flipped and re-positioned in order to cut the external geometry, making it a bit tricky. In order to properly mill these I had to be careful about order of operations making sure it was possible for me to properly hold the pieces when cutting the reverse side.
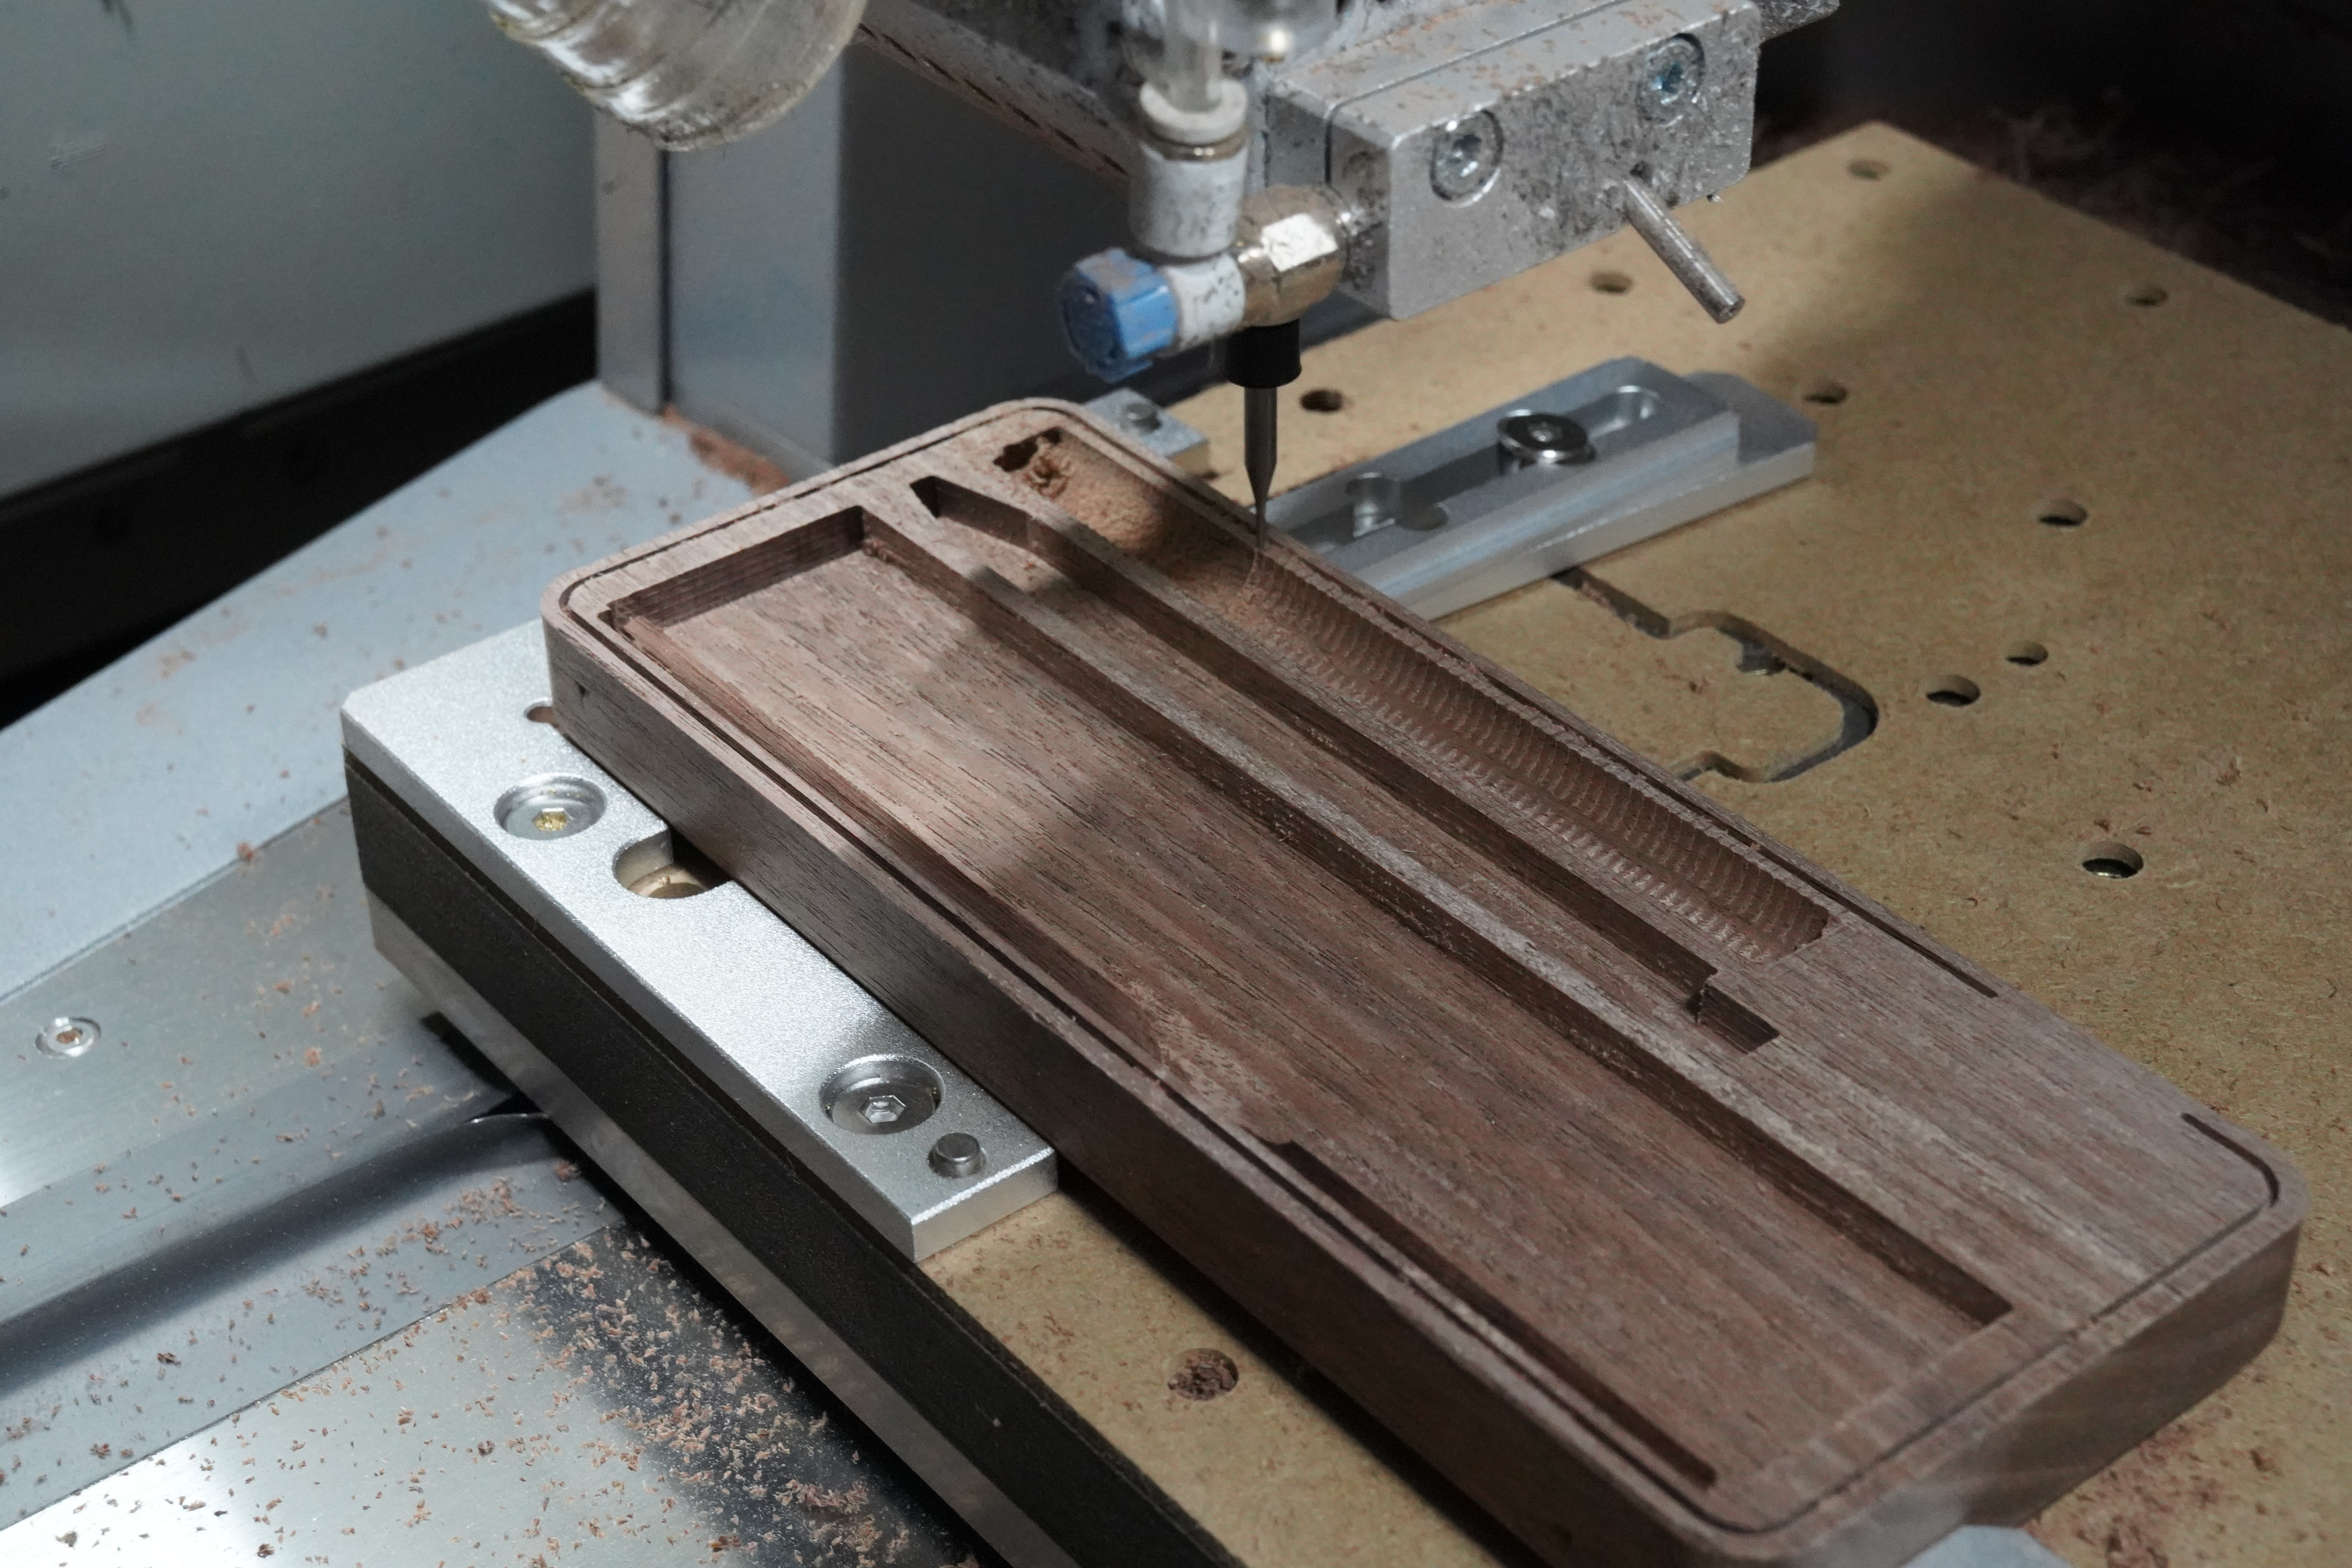
In Figure 3 I show an example of milling the internal geometry of one of the halves, showing clearly how the pockets are milled to fit the items perfectly, it was important to use ball nose bits for the pencil pocket in order to get a good finish surfact that needed little sanding.
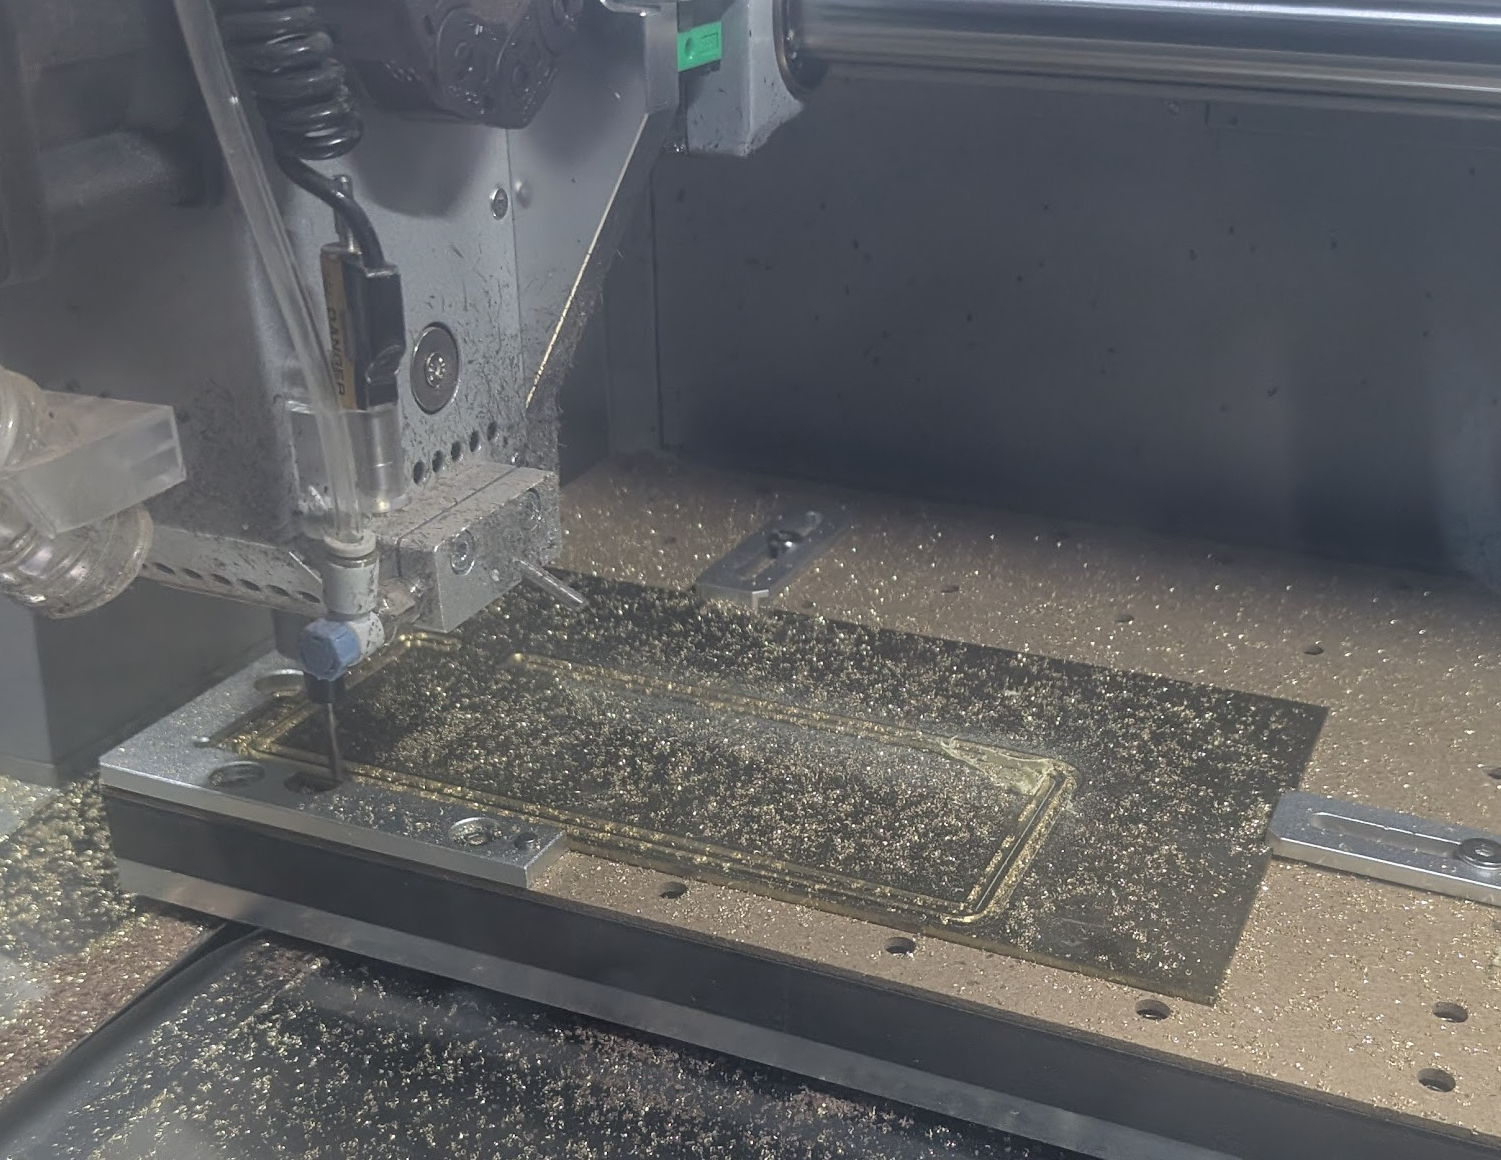
I show in Figure 4 the brass track that was milled from brass plate in order to perfectly fit in the grooves milled in the walnut halves. This ended up needing more hand finishing in order to get the fit right, as I purposely milled the track 0.05mm too wide in order to be able to sand back the width slowly getting a good feeling friction fit.
Final Product
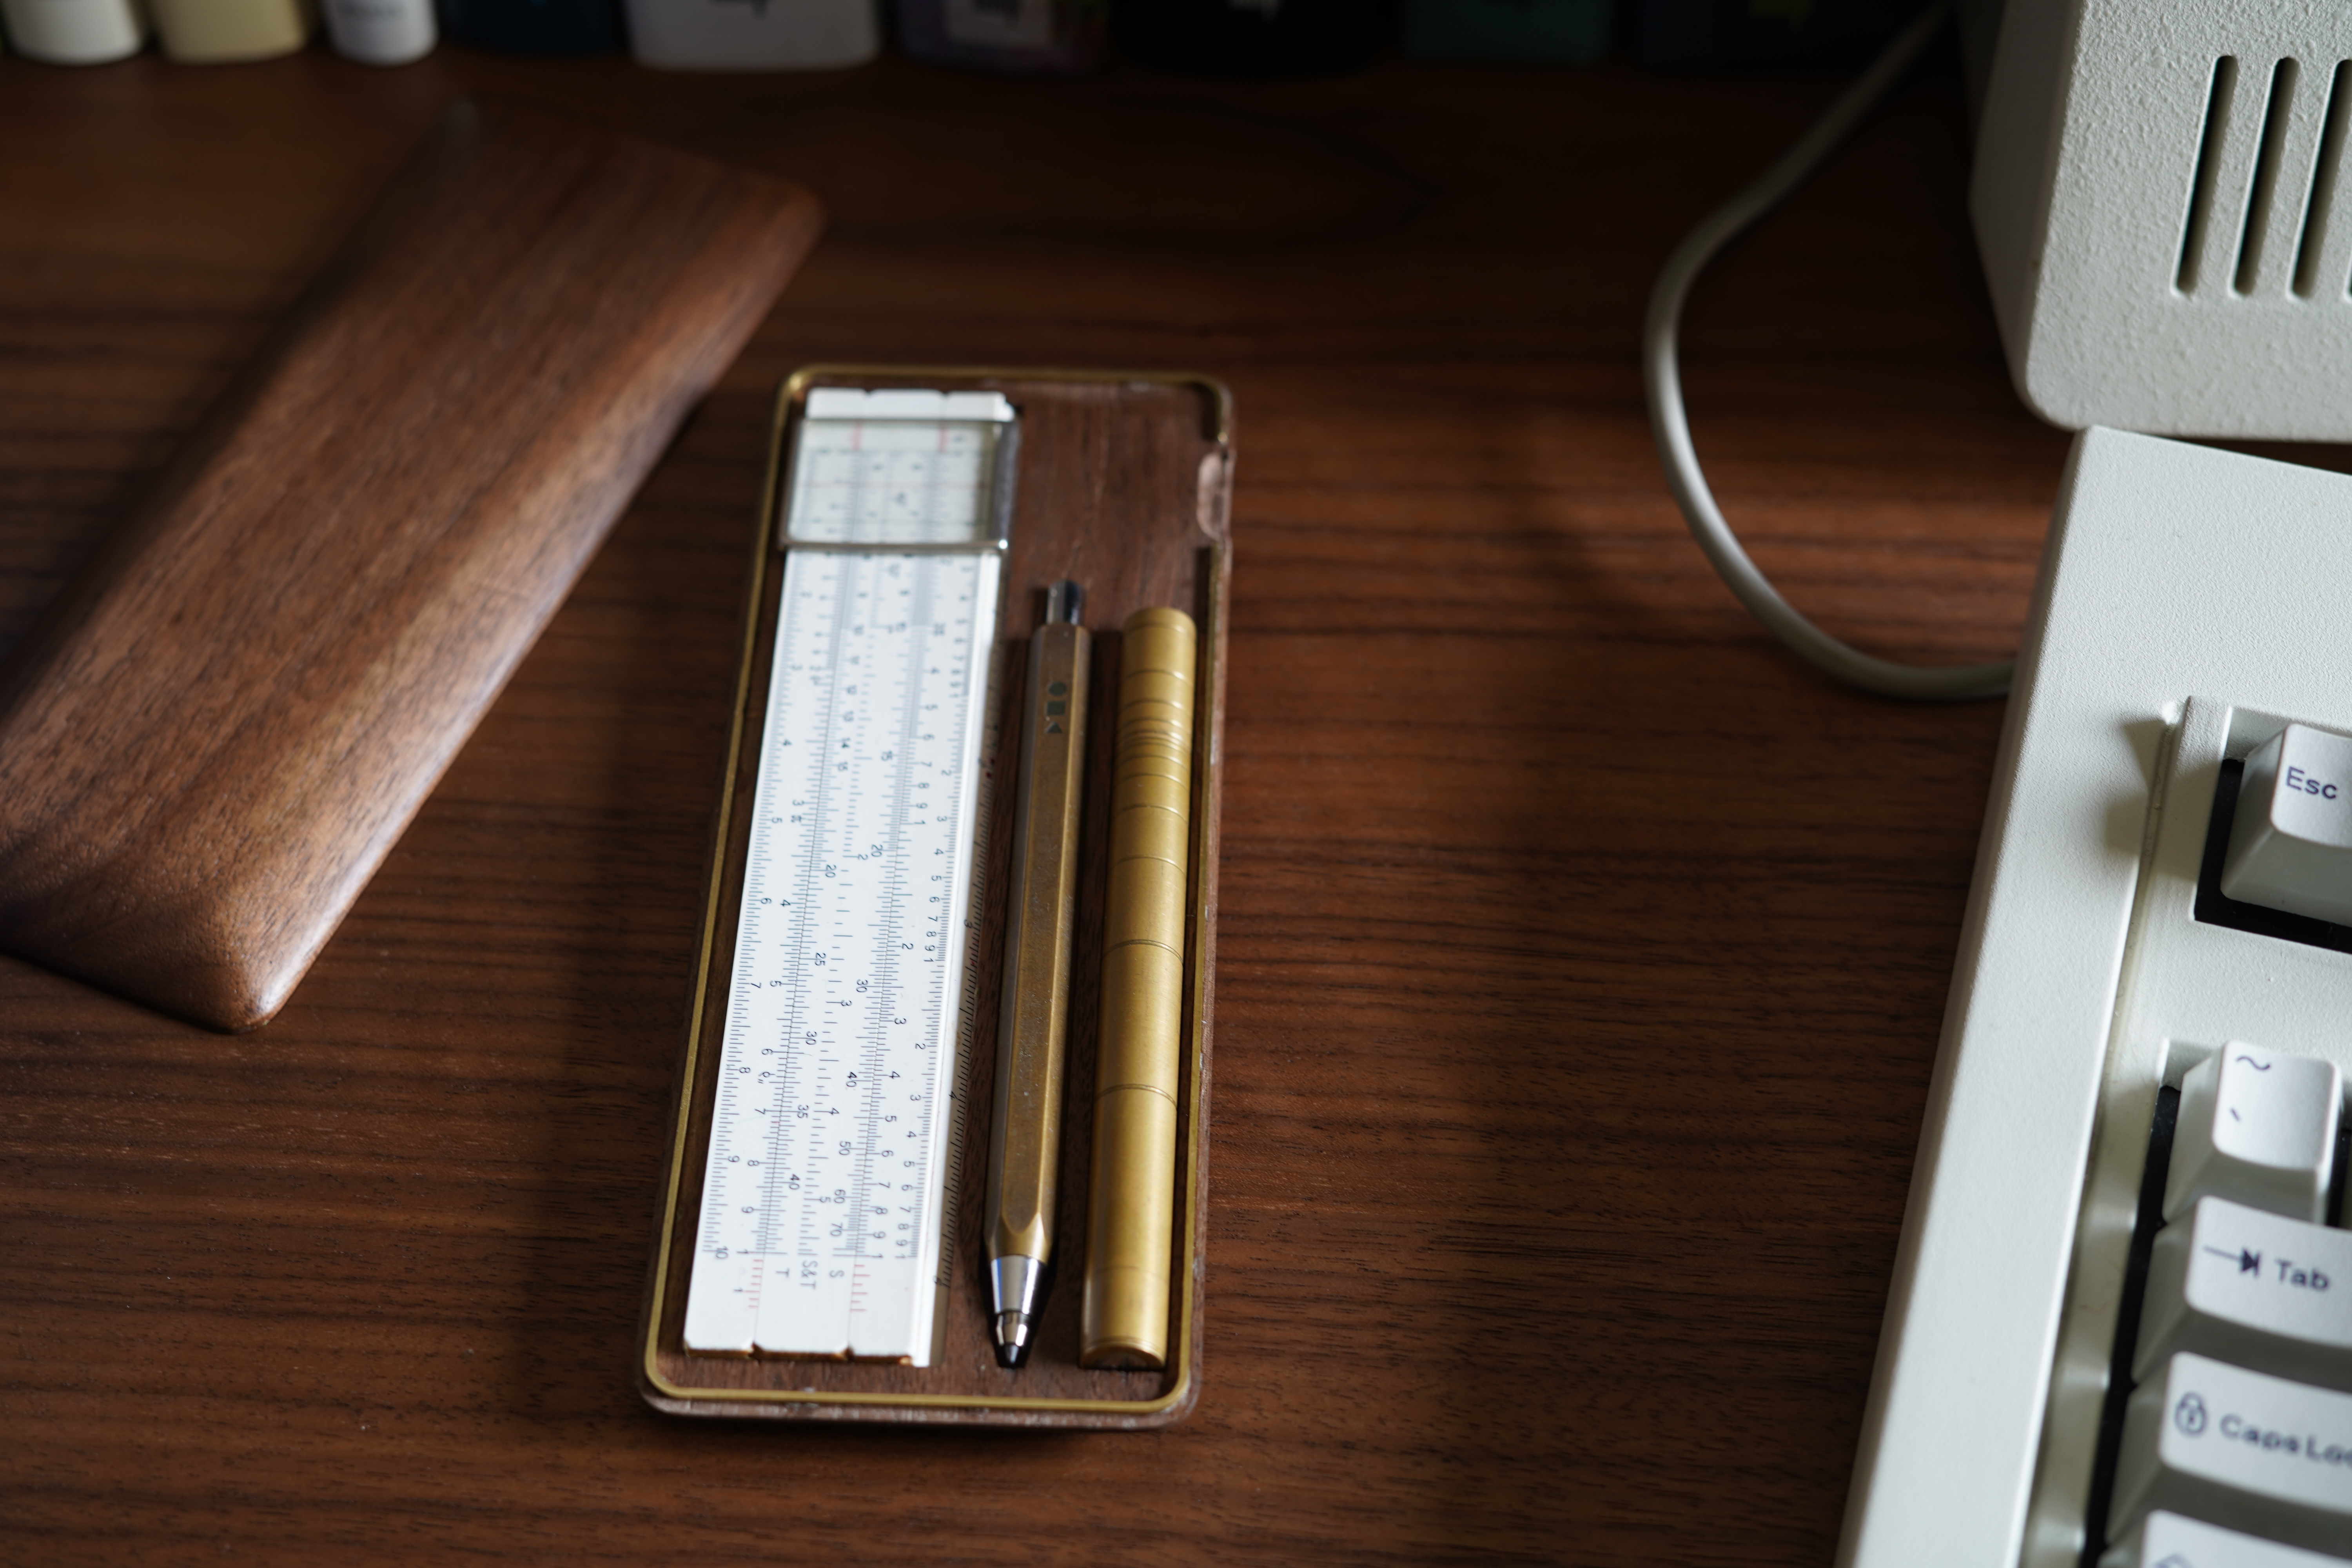
In the end I’m very happy with the result. I have managed to use it on a few trips already and it provides great protection and organisation alongside my notebook. If I was to create a second version of this I would probably increase the depth of the pockets in order to allow for a material like baize to be used, unfortunately I had this idea only after finishing the internal machining with tight tolerances for the various items. This means there is no room to now add this material.
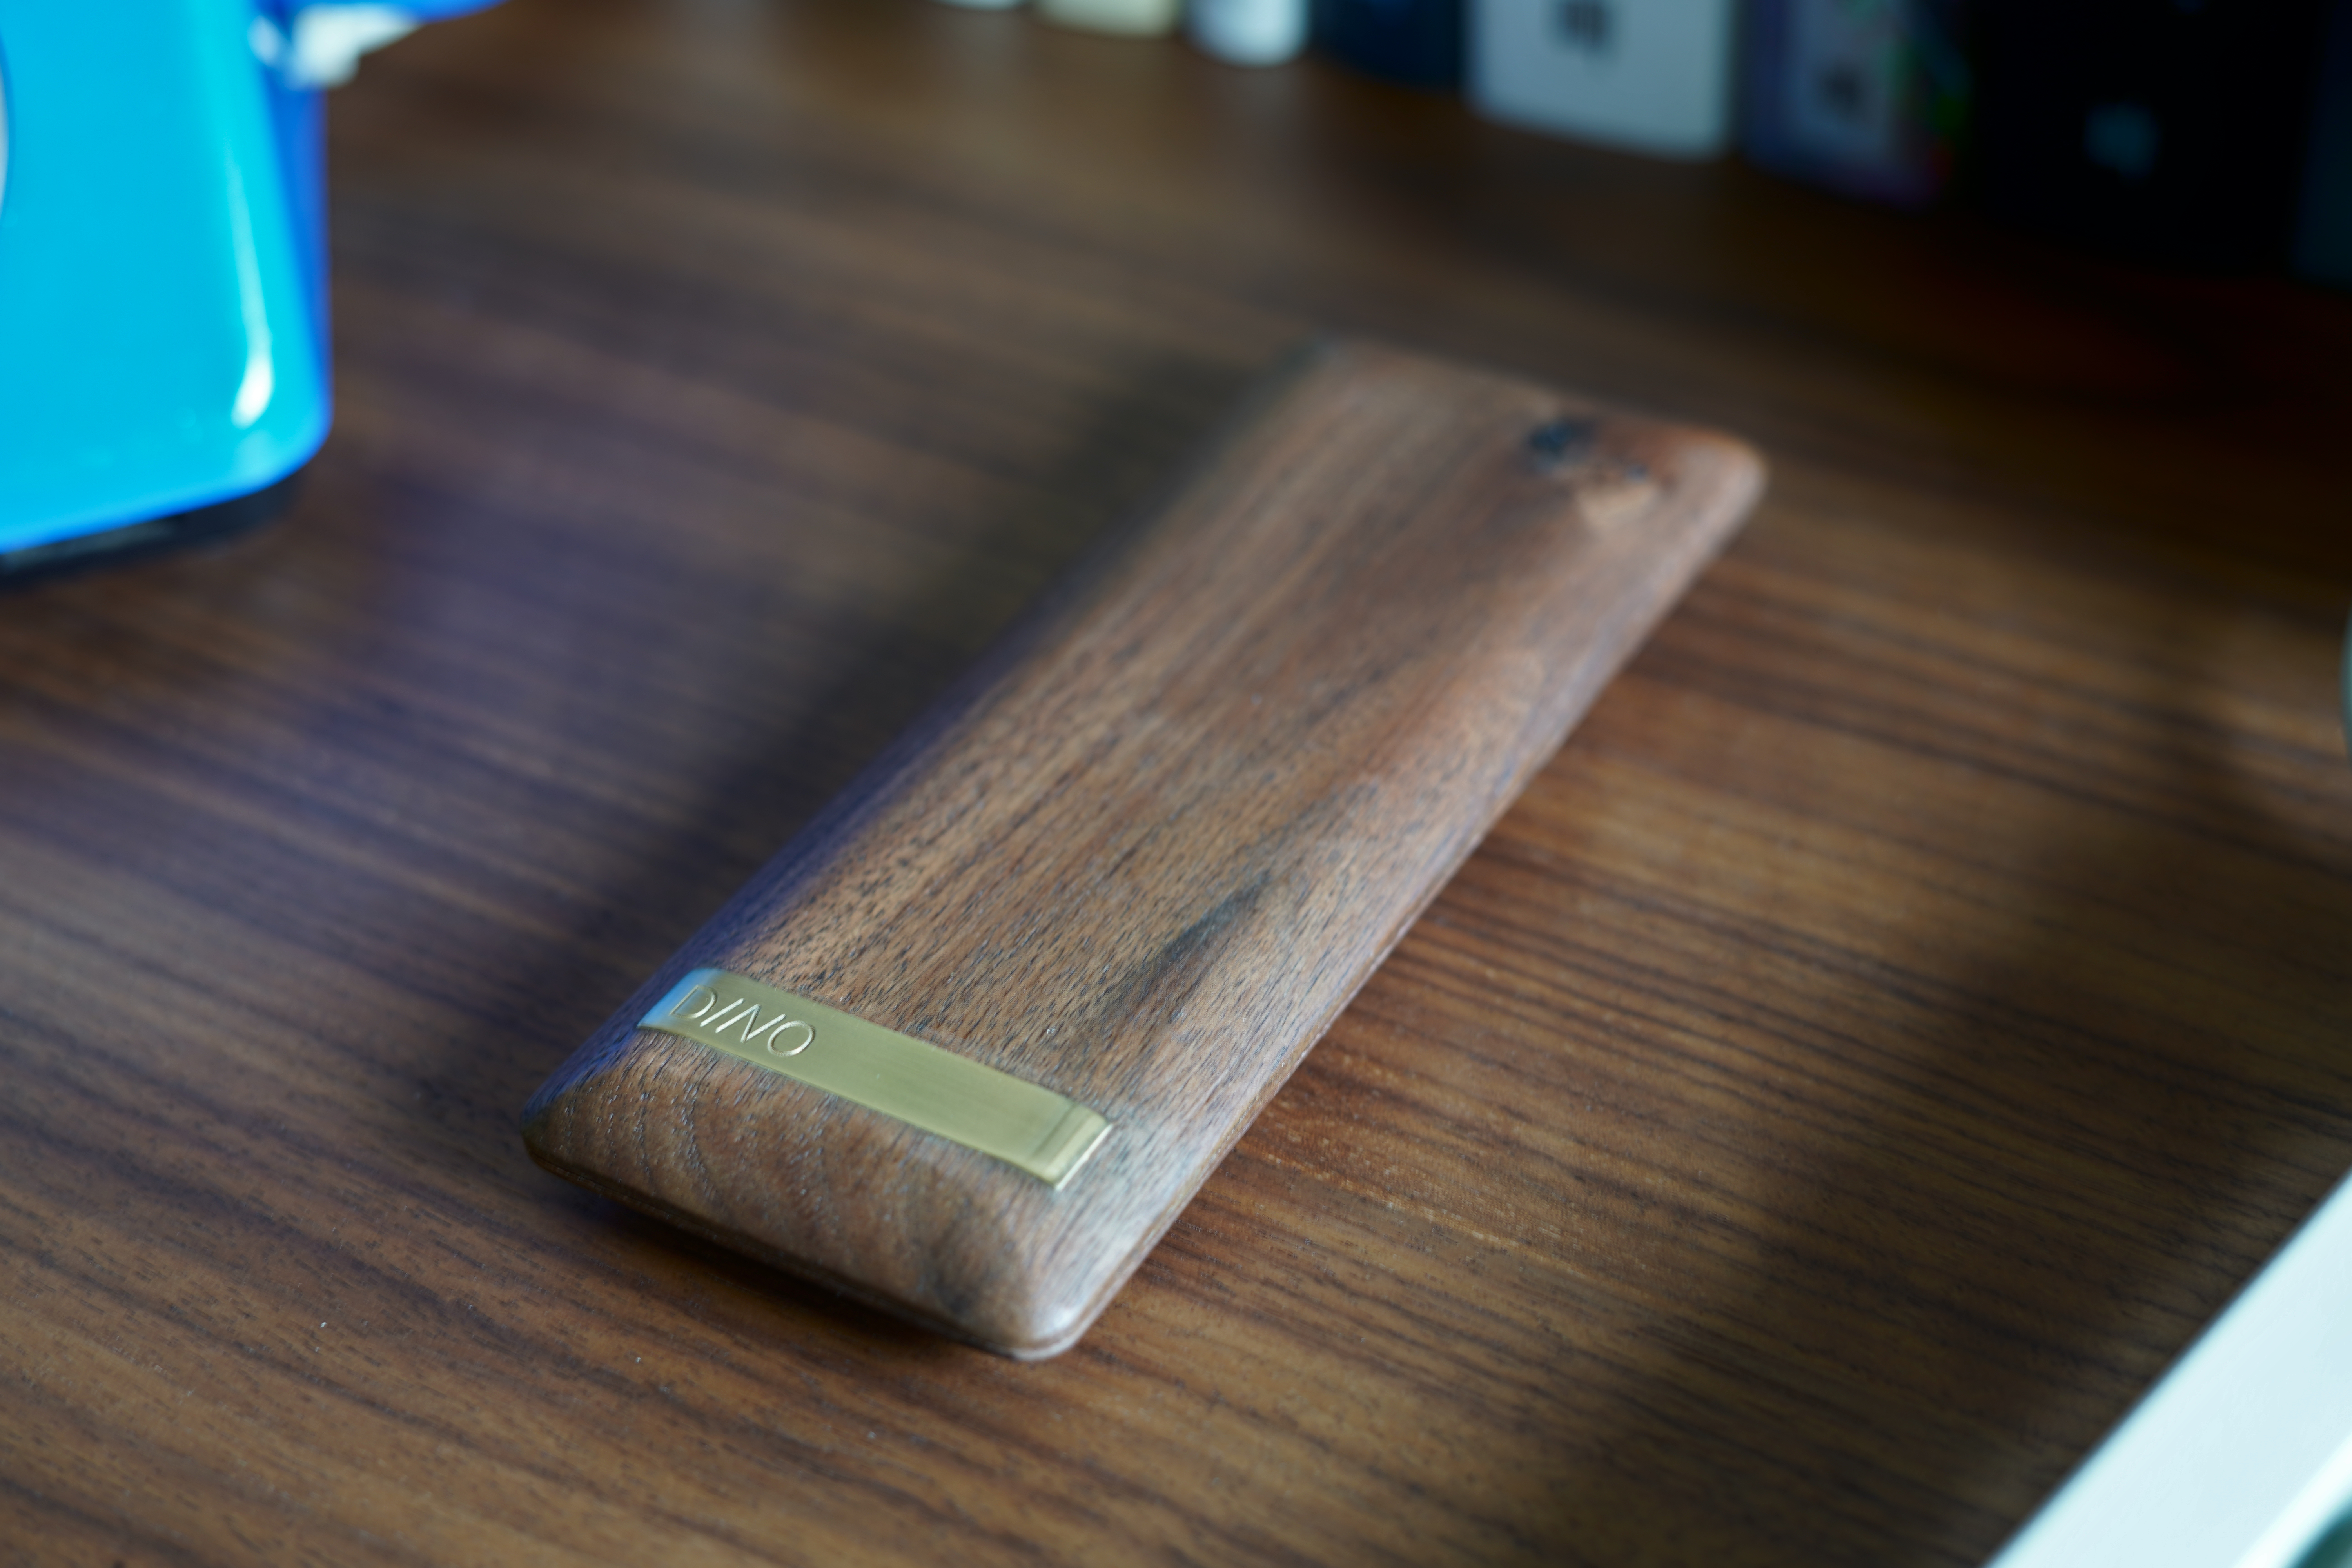
I like the result of having moslty uninterrupted walnut wood with only a small bar giving grounding to the item by indicating the bottom of the back face of the case. This plate is rarely seen as it would sit face down on a desk. In the future I might continue creating similar cases but for devices that I carry with me each day. But for now I think I’m going to focus on another project involving more focus on electronic engineering than industrial design.